Welcome to our latest blog article series where we bring you the most recent updates from HubSpot in 2024!
In this edition, we'll delve into the exciting new features and improvements rolled out for HubSpot CRM, designed to streamline your workflows, enhance data integrity, and empower your marketing and sales teams like never before.
Let's dive in and explore these updates together!
What's inside:
1. Actionable Notifications in HubSpot's Microsoft Teams Integration
2. AI assistant: Subject Line Generation
3. Workflow Enrollment Diagnosis
4. Enable Double Opt-In for forms
5. Add your own titles to AI blog post generator
6. Campaigns metric 'influenced contacts' now includes Ad interactions
Actionable Notifications in HubSpot's Microsoft Teams Integration
When configuring custom Microsoft Teams notifications via workflows, you now have the option to embed action shortcuts directly into the notification. These shortcuts enable you to quickly execute various actions within Microsoft Teams, such as creating a task or note, logging a call, meeting, or email, updating a record, or emailing or calling a contact.
Imagine a scenario where you set up a workflow to send a reminder to a specific channel when a deal has remained in a specific stage for over 15 days. Now, you can embed actionable shortcuts within this notification, such as:
Create Task: Prompting you or a teammate to create a task for follow-up with the contact.
Update Deal: Enabling you to modify crucial information pertaining to the deal.
Create Note: Providing relevant context directly on the record page.
With these shortcuts, your team can quickly take action on pertinent information directly from the notification within Microsoft Teams.
Today, the "Send Microsoft Teams Notification" workflow action allows you to send custom notifications to specific people or teams within your organization when something important happens. But the best notifications aren't merely informative - they're also actionable.
With the Microsoft Teams Integration update, you can embed actions into your notifications to empower your team to save time and take immediate action when something meaningful occurs.
How does it work?
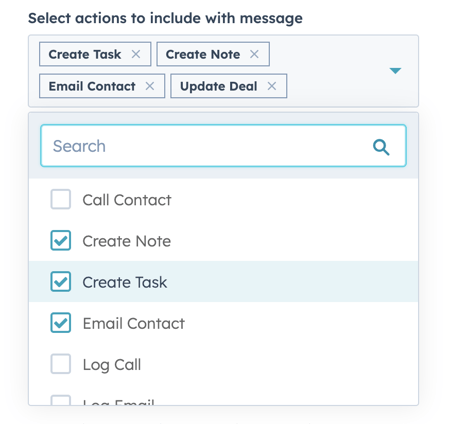
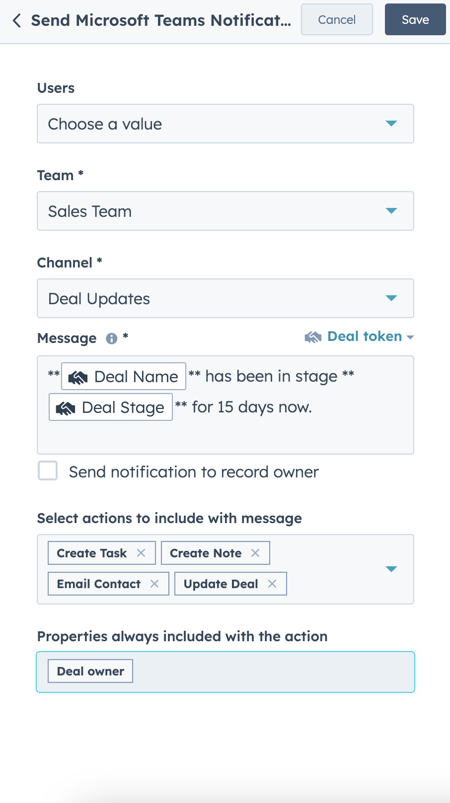
- When configuring a workflow to "Send Microsoft Teams Notification", you will now see an optional field where you can "Select actions to include with message":
- Once actions are selected, when the notification appears in Microsoft Teams, it will look like this
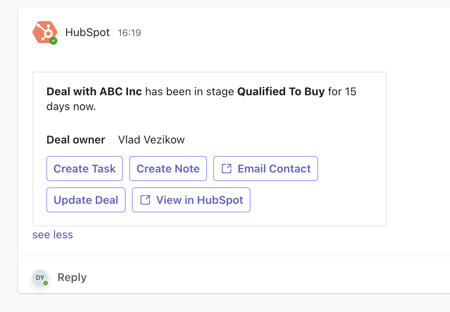
- From here, you can click any of the action buttons to execute the action
- Actions can be added or edited at any time.
AI Assistant: Subject Line Generation

Content creators can now easily generate an email subject line for their campaign, complimenting the ability to generate and edit email copy within the Email Editor.
Powered by email insights and best practices from HubSpot, the Subject Line Assistant will read the content of your marketing email and generate three subject lines accordingly. You will not need to prompt the tool, instead you can generate subject lines on the click of a button.
Subject line generation will be available on desktop and the HubSpot mobile app for last minute or on-the-go adjustments to your marketing email.
Writing an effective, interesting, and attention-grabbing subject line is crucial for your email's open rate. However, creating engaging subject lines is one of the many time-consuming tasks that Email Marketers have daily.
The Subject Line Assistant jumpstarts the writing process, helping generate email subject lines in a flash. By automating this process with HubSpot AI, you can focus on other critical tasks and scale and optimise your content creation efforts.
How does it work?
On dekstop:
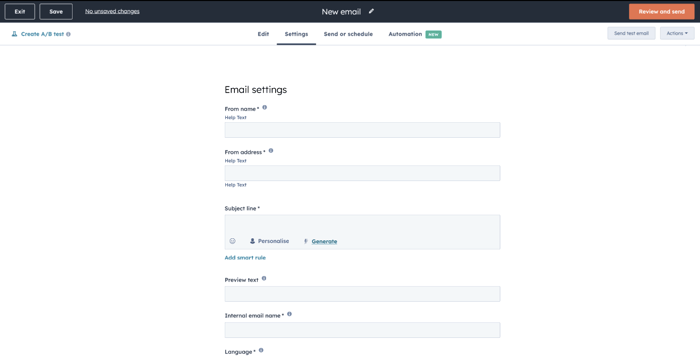
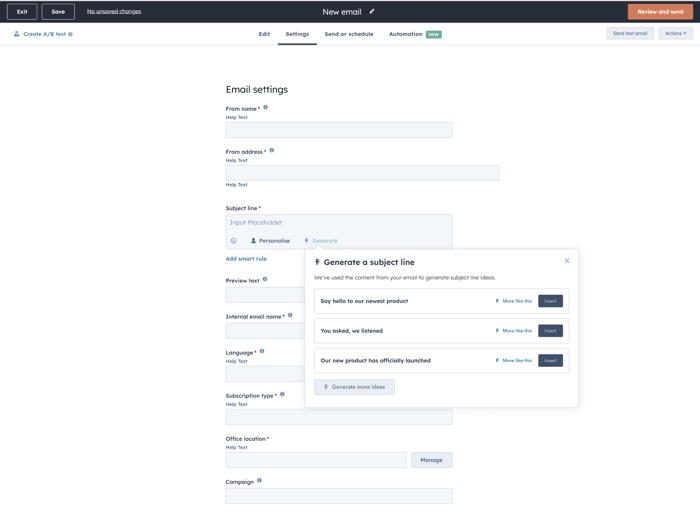
- Navigate to the Subject Line Field in the Settings tab.
- Click the "Generate" trigger button next to the email subject field.
- Select your favourite subject line and click "Insert".
- Select "Generate more ideas" for more options.
- Click "More like this" to generate three more subject lines based on your preferred subject line option.
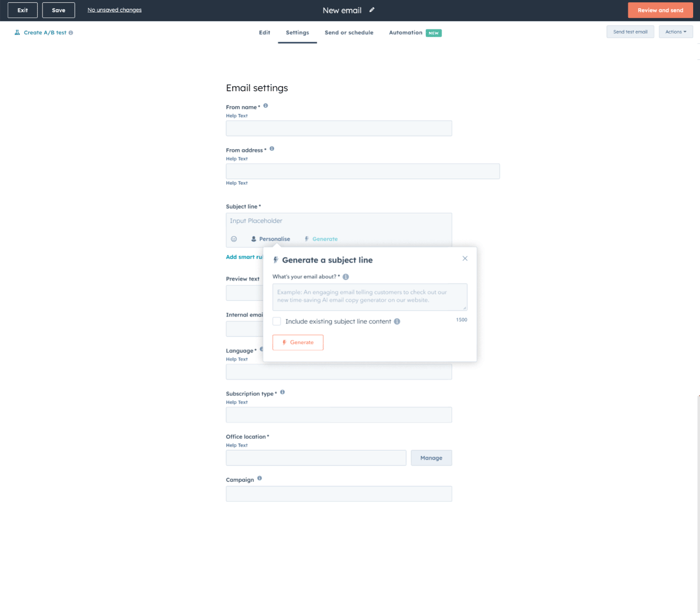
If your email body contains less than 400 characters, you can to prompt the tool to generate your subject line. After you click generate, describe what your email is about.
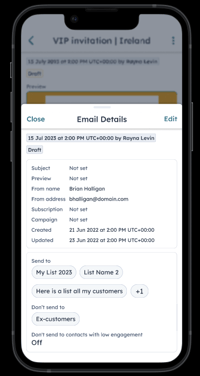
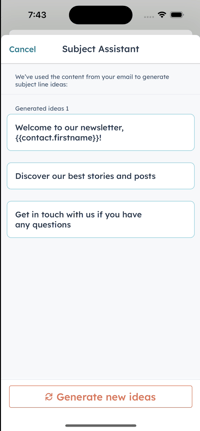
On the HubSpot mobile app:
- Navigate to your email details and click "Edit".
- Click the Content Assistant lightening icon to generate your subject lines.
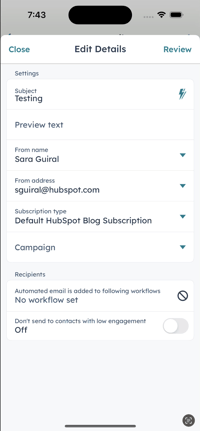
- Select your favourite subject line and click "Insert this idea".
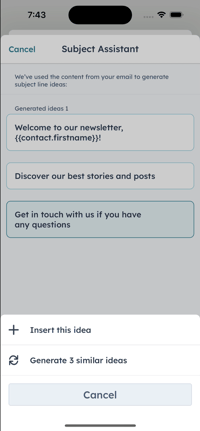
- Click "Generate 3 similar ideas" to generate three more subject lines based on your preferred subject line option.
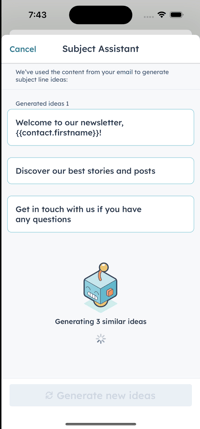
- Select "Generate" for more options.
Workflow Enrollment Diagnosis
You can now efficiently troubleshoot workflow enrollments directly in-app! This functionality will empower users to independently investigate and resolve workflow enrollment questions.
The tool provides users with:
- Comprehensive logs detailing the enrollment status of each record.
- A clear indication of successful enrollments
- Reasons a workflow wouldn't (or did not) enroll
Many customers use workflows but users often face challenges understanding why certain records either enrolled or failed to enroll in a workflow. Without much visibility into what did (or didn't) occur, users had to rely solely on HubSpot Support for help investigating workflow enrollment questions.
This solution provides customers with enrollment information directly in the workflow tool and will empower you to quickly and efficiently resolve workflow enrollment discrepancies!
How does it work?
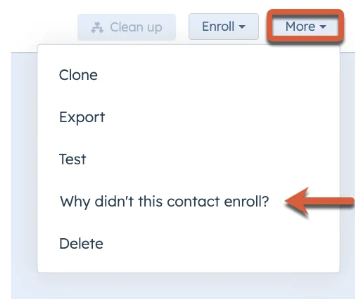
Why didn't this [object] enrol?
- In your HubSpot account, navigate to Automation > Workflows.
- Click the name of your workflow.
- In the top right, click More > Why didn't this [object] enroll?
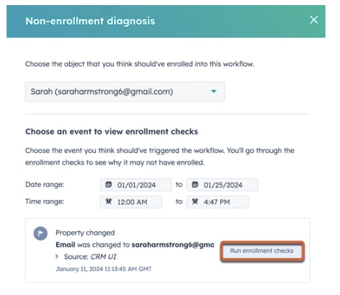
- In the right panel, click the dropdown menu and select the object you think should have enrolled.
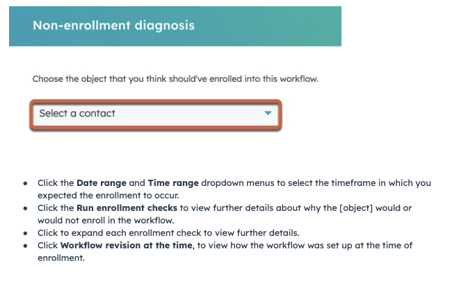
- Select a contact
- Click the Date range and Time range dropdown menus to select the timeframe in which you expected the enrollment to occur.
- Click the Run enrollment checks to view further details about why the [object] would or would not enroll in the workflow.
- Click to expand each enrollment check to view further details.
- Click Workflow revision at the time, to view how the workflow was set up at the time of enrollment
- When you're finished, click Done. Or, click Back to select another object or event.
Why Did This [Object] Enroll?
- In your HubSpot account, navigate to Automation > Workflows.
- Click the name of your workflow.
- In the top left of the workflow editor, click Details.
- Navigate to the Enrolment history tab.
- To view further details about the enrolment event, hover over an enrolment event, then click Why did this enrol?

- In the right panel, view the date and time of enrollment and the reason why the record enrolled in the Enrollment information tab. This view displays the exact values at the time of the enrollment.
- If you're using a property value or form submission enrollment trigger, you can view details about the state of the property when the record enrolled in the workflow by clicking View more details.
- In the Record timeline tab, view details about the events that led up to the record enrolling in the workflow.
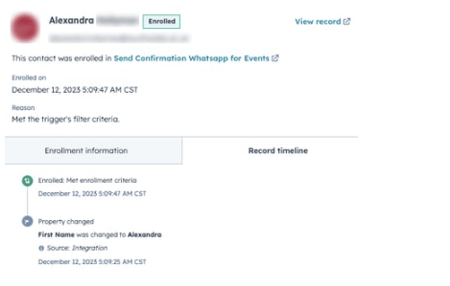
- In the top right, click View record to open the record in your HubSpot account.
- Click Done to return to the Enrollment history screen.
Enable Double Opt-In for forms
As we know, it was only possible to enable/disable double opt-in for select pages created in HubSpot.
With this change, you may choose to enable/disable double opt-in for select pages AND select forms of your preference.
There are also some updates to action descriptions/copy to make it clearer.
More flexibility to apply double opt-in for certain situations, i.e. if it is mandatory for some countries but not others, you can have select forms in which DOI is used vs other forms in which it is not.
How does it work?
Here is how you can set up double opt-in per form(s):
- In your HubSpot account, click the settings settings icon in the main navigation bar.
- In the left sidebar menu, navigate to Marketing > Email.
- Click the Subscriptions tab.
- Navigate to the Double opt-in section on the page.
- Click the Select where DOI should be turned on in the dropdown menu to choose how the double opt-in feature should be applied:
- All forms and pages: use double opt-in on all your HubSpot forms, pages, and non-HubSpot forms. New contacts created through an import or API will need to have their subscription types confirmed too.
- Turn on for some forms and pages only: use double opt in on specific HubSpot forms and pages only.
- Turn off for some forms and pages only: don't use the feature on specific HubSpot forms or pages.
- If you don't have double opt-in already enabled, then you must first Publish opt-in email to customize the email that will go out to customers after they submit a form, then follow the above steps.
Add your own titles to AI blog post generator
You can now edit the example titles and keywords shown in the second step of the AI blog post generator. Your edited/updated title will inform the AI outline we recommend for the next step.
The AI blog post generator does a great job of helping users who don't quite know what they want to write about. However, it doesn't support users who know exactly what they want to write about, since you can't put in your own titles and generate posts from those. One of our top feedback requests is from users asking for more control over the generated blog post. So we made all of the titles on step 2 of the wizard fully editable!
How does it work?
- Go to the blog and click the "Generate blog post" icon in the upper right.
- Go to the second step of the wizard, where you see recommended titles and keywords.
- Hover over a title and click on it or on the pencil icon to edit the title. Your edited title will inform the outline that is generated in the next step
Campaigns metric 'influenced contacts' now includes Ad interactions
The Campaigns metric 'influenced contacts' now includes contacts that interact with ad(s) in associated Ad campaigns.
Up until today, any interaction with an associated Ad campaign was not counted towards the sum of 'influenced contacts'. This discrepancy has now been removed ensuring 'influenced contacts' support every asset type available in the Campaigns app.
Campaigns with associated Ad campaigns generating 'Ad interaction' events. Please note that any Ad interactions of contacts before today are not included in the calculation of 'influenced contacts'.